Branches
Arctic enables you to create Git-like branches in your catalog to safely experiment with data in isolation without disrupting production workloads. With branches, you can make changes to data safely without requiring separate expensive development and testing environments.
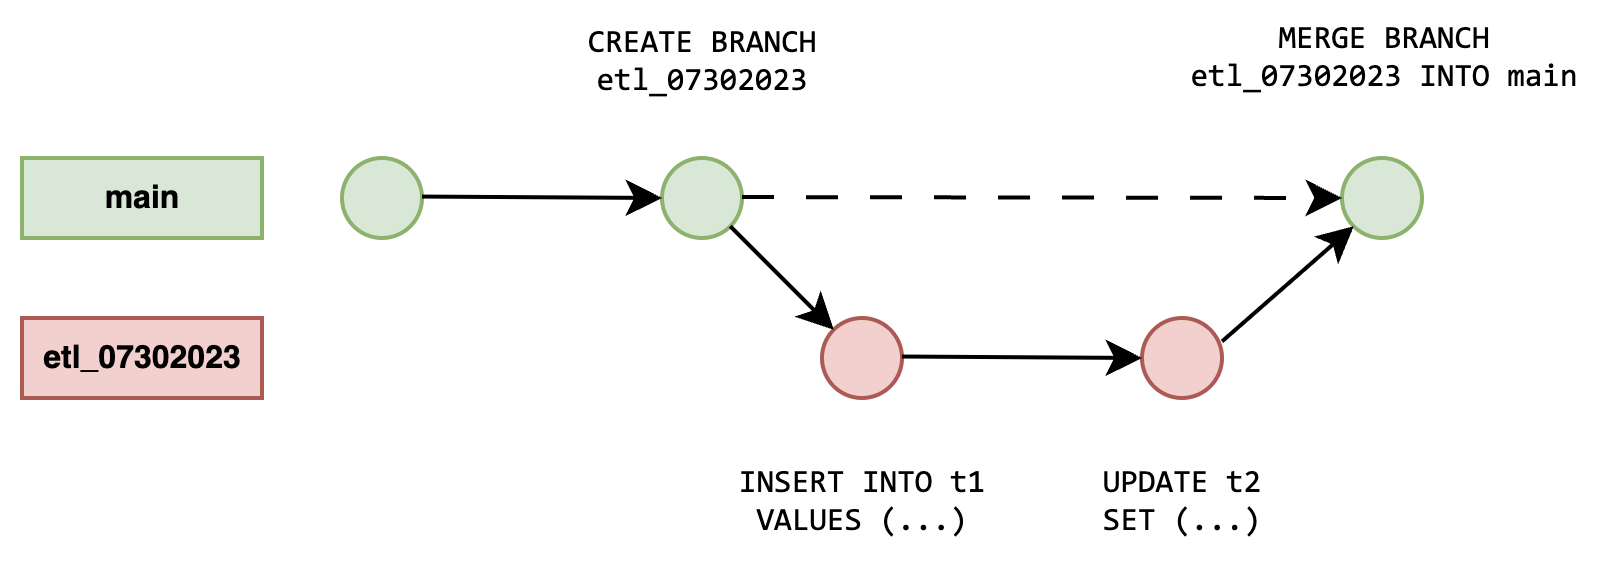
For example, you can create a branch to make non-trivial changes (e.g., data loading, schema changes, or partition evolution), do performance testing and validate data quality, and then merge changes into production once you’re comfortable with the changes.
When you create a branch, Arctic doesn’t make physical copies of your underlying data. Instead, it works to version separate lists of files associated with your dataset. Arctic keeps track of which files are related to each of your tables at every point in time and then allows you to recall those as needed.
- A branch is technically a named reference to a series of commits in a catalog.
- You always create a branch from an existing branch. New branches contain the complete commit history from their parent branches, so users who experiment with data on a branch can also understand how data has evolved over time.
- An Arctic catalog is always initialized with a single branch, named
main. Like the main branch in a Git repository, the main branch in an Arctic catalog represents your production data, and is the default branch displayed whenever you explore your data in the Dremio UI.
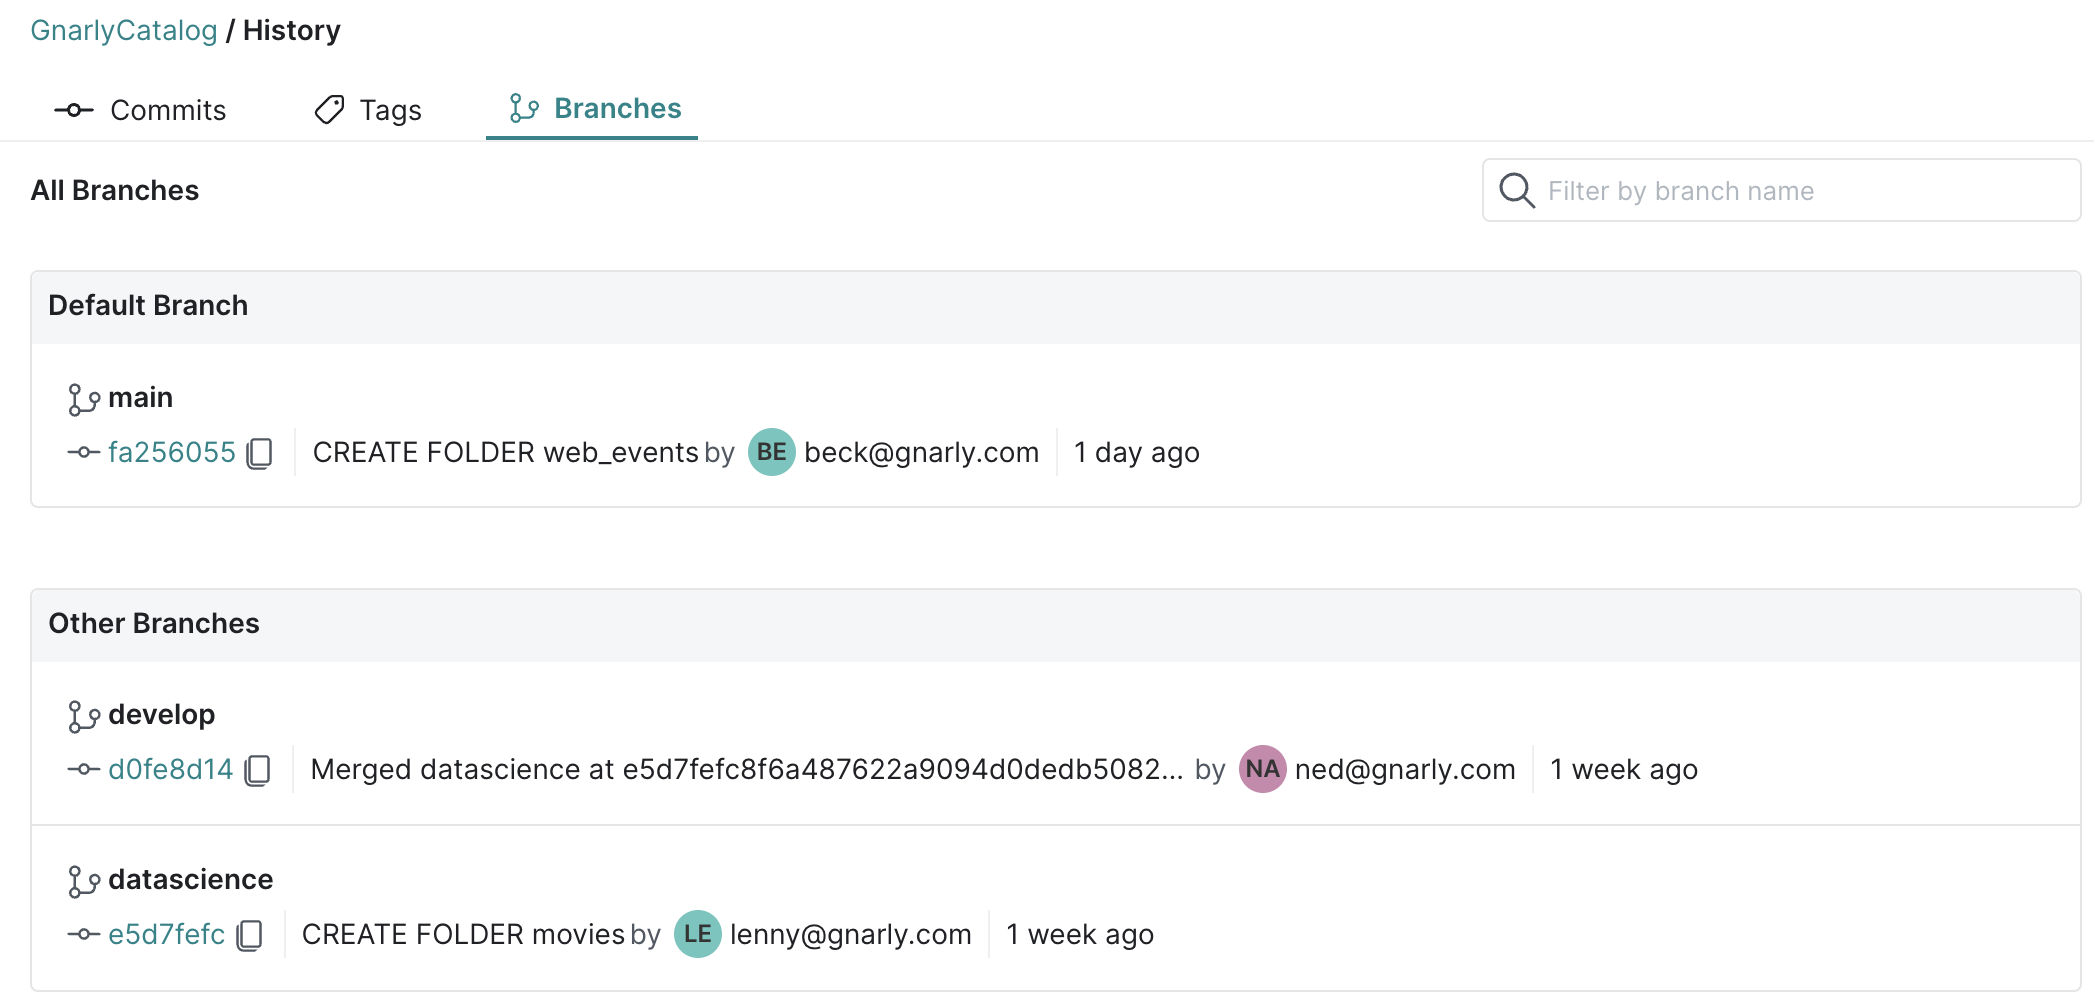
Viewing Branches
To view branches in your catalog:
- Select the Sonar project that contains your Arctic catalog.
- In the left hand side of the Datasets page, click on the name of your Arctic catalog.
- On the upper right of your Arctic catalog page, click the History button.
- On the top of the page, click the Branches button.
Creating Branches
You can use the CREATE BRANCH command to create a branch. You can create a new branch from any existing branch, tag, or commit. For example:
CREATE BRANCH develop AT COMMIT "098a092384fa489283498acdfeffba1411287941"
Branch names must be unique in the catalog. Branch names cannot be the same as tag names. To learn more about the CREATE BRANCH command, visit the SQL Reference.
Querying Branches
You can query data at a certain branch by referencing it as part of your query. For example:
SELECT * FROM GnarlyCatalog.Sales AT BRANCH "develop"
To learn more about querying branches, visit the SQL Reference and API Reference.
Merging Branches
You can merge changes from one branch into another with the MERGE BRANCH command. For example:
MERGE BRANCH "develop" INTO "main"
Merges happen instantaneously, which means branches enable you to roll out changes to multiple tables simultaneously. Under the hood, a merge applies the commits of one source branch onto another target branch, unlike a real multi-table transaction where all changes would be in the same commit.
To learn more about the MERGE BRANCH command, visit the SQL Reference.
Deleting Branches
If you no longer need to use a branch, you can delete it using the DROP BRANCH command. For example:
DROP BRANCH "etl_07302023"
To learn more about the DROP BRANCH command, visit the SQL Reference.
Limitations
A table containing parallel changes on both source and destination branches cannot be merged. The workaround is to re-branch from the destination branch's head reference point, reapply your changes to that table, and retry the merge.