Creating Reports by Connecting to Dremio Enterprise with the Dremio Cloud Connector
If you want other Power BI users to use Single Sign-On (SSO) when viewing your reports from Power BI Service, create your reports by using the Dremio Cloud connector to connect to your Dremio Enterprise cluster. After you publish a report, enable it to support SSO.
For information about what SSO is, see the note in Creating Reports.
Prerequisites
-
Ensure that a Dremio administrator has configured TLS on your Dremio cluster.
-
Ensure that a Dremio administrator has configured your Dremio cluster for authentication with Azure Active Directory. Have an administrator refer to Supported Methods of Authenticating from Power BI Desktop to Dremio.
-
Ensure that a Power BI administrator has enabled SSO. Have an administrator refer to Enabling Single Sign-On.
1. Creating a Connection to Dremio Enterprise
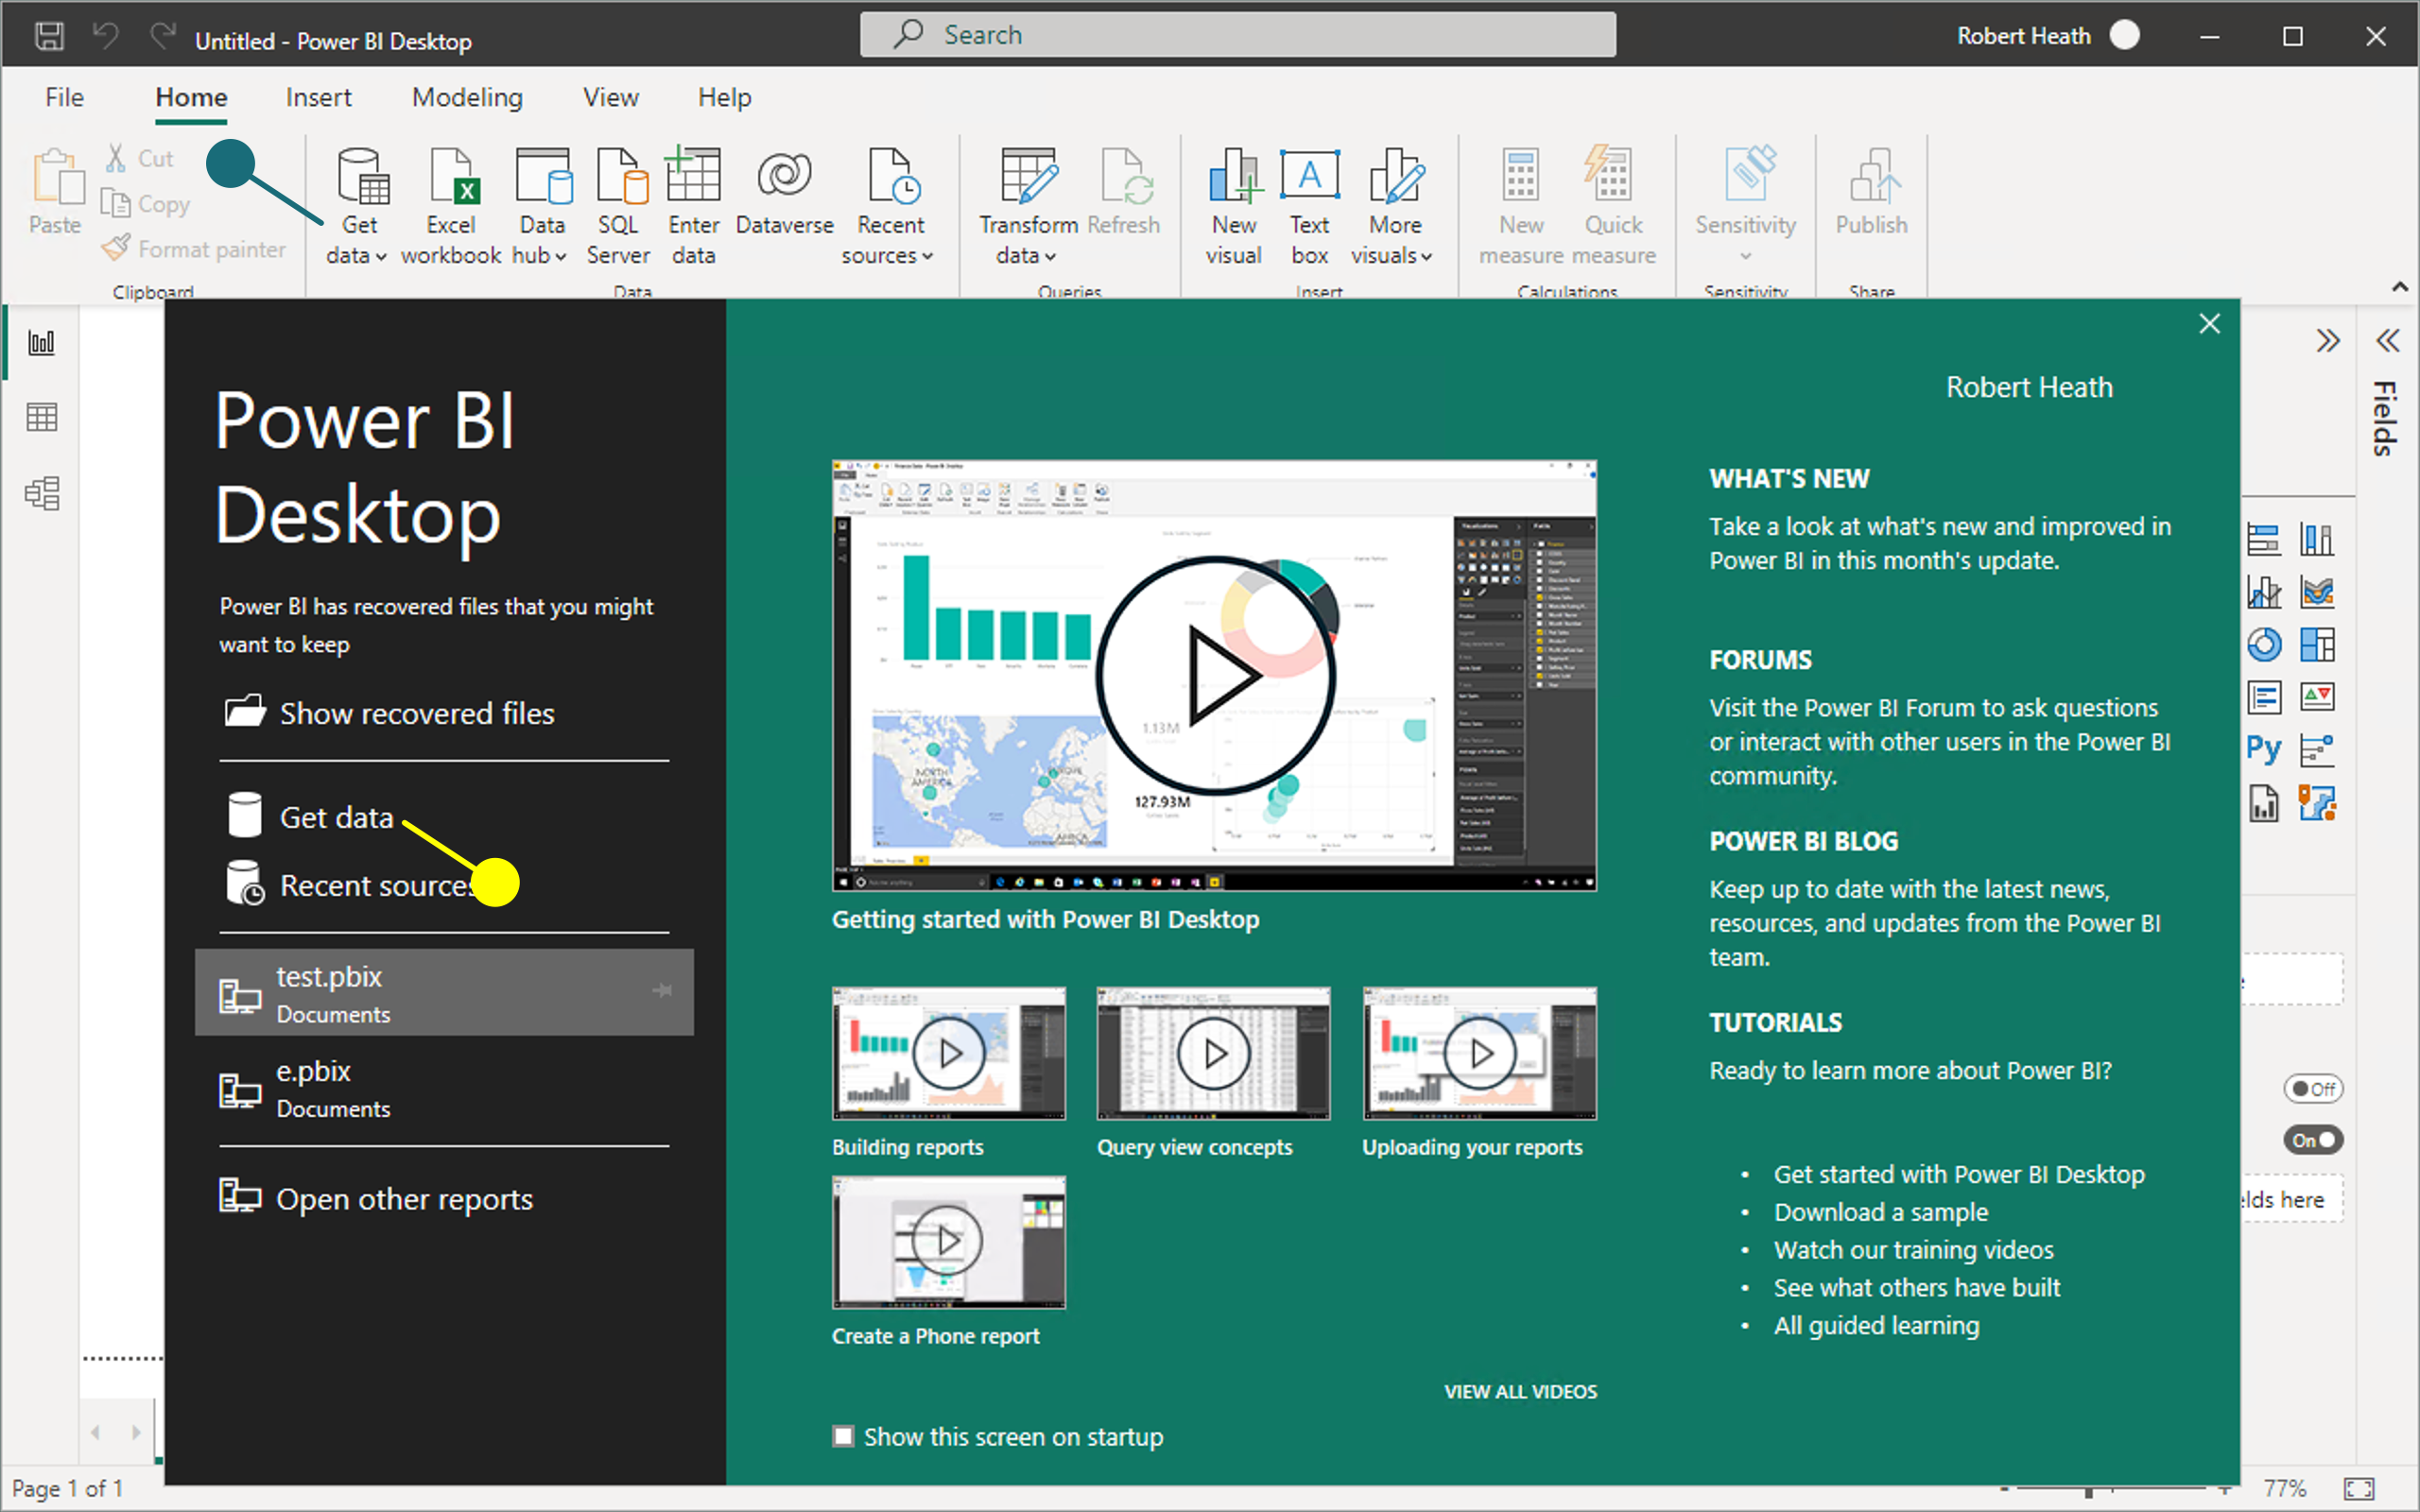
- In Power BI Desktop, click Get data. The pins in this image show two locations for this option.
-
In the Get Data dialog, search for "Dremio"; then, select Dremio Cloud.
-
Click Connect.
-
Follow these steps:
a. In the Server field, specify the hostname or IP address of the coordinator node of your Dremio cluster. If you are using a port number other than the default of 443, specify the port number, too, using this format:
hostname:port_number.noteIf you are using TLS for connections to your Dremio cluster, ensure that you specify a hostname that matches one of the following fields in the certificate associated with the hostname and client port that Power BI connects to:
- Subject - Common Name (CN)
- Subject Alternative Names (SAN)
b. (Optional) In the Engine field, specify the name of the engine on which to run queries that use this connection. If you do not specify an engine, one is selected automatically according to engine routing rules set up for the cluster.
c. (Optional) In the Tag field, specify a tag that you can use together with rules for routing queries. See Workload Management for more information.
d. (Optional) In the Queue field, specify the name of a queue that you want to route queries to while this connection is open. See Workload Management for more information.
e. If you are using a certificate that is based on a root CA that is not installed in the truststore on your Power BI Service Capacity, select Enabled-PEM in the Trusted certificates location field.
f. Under Data Connectivity mode, select DirectQuery.
note- No data is imported or copied into Power BI Desktop. As you create or interact with a visualization, Power BI Desktop queries the underlying data source, so you’re always viewing current data.
- Using DirectQuery might prevent the use of aggregation Reflections for accelerating queries on columns that use the FLOAT datatype. DirectQuery translates FLOAT columns to DECIMAL columns when loading tables into Power BI. Then, in queries on the transformed columns, Power BI casts the DECIMAL to DOUBLE, which prevents such queries from matching aggregation Reflections that use FLOAT for those columns.
-
Sign in to your Dremio cluster. Select Microsoft Account in the sidebar. If you are already signed into a Microsoft account, the username for it appears in the dialog. If that is the account you want to use, click Connect. Otherwise, click Sign in, specify your username and password, and then click Connect.
You can use Microsoft authentication only if an administrator for your Dremio cluster has enabled the use of Microsoft credentials. You must use your Microsoft credentials if you want to enable Single Sign-on for viewers of reports created with this connection.
The Navigator window is opened, listing the datasets in your project.
2. Publishing Reports
After you create a report that uses data in Dremio, you can publish the report to Power BI Service.
- Launch Power BI Desktop.
- Sign into Power BI Service, if you are not already signed in. To sign in, select File in the top-left corner of the screen and then select Sign in at the bottom-left corner of the menu that appears.
- Navigate to Files > Publish > Publish to Power BI.
- Select the destination. You may pick from a list of available workspaces to choose the desired one on which to publish. Select the workspace, and then click the Select button to publish.
If Power BI Service connects to Dremio through Power BI Gateway, follow these additional steps:
You must connect to your Dremio cluster through a gateway if the cluster is behind a firewall.
- Log into Power BI Service.
- Select Workspaces > Name of workspace.
- In the list, find your dataset for your report in the list, click the ellipsis button, and select Settings.
- In the settings for the dataset, expand Gateway connection.
- Recreate your data source by following these steps:
- Select the Maps to field.
- Select Manually add to gateway.
- In the New data source dialog, create a data source that matches the one that you previously used for your dataset. However, give the new data source a different name.
- In the Authentication method field, select OAuth2. Then, follow these steps:
- Click Edit credentials.
- Keep the authentication method OAuth2 selected.
- Keep the privacy level Private selected.
- Click Sign In. Follow the sign-in process until you return to this location.
- Click Create.
- Return to the settings for your dataset.
- Under Gateway connection, verify that the new data source is selected in the Maps to field.
3. Enabling Single Single-On on Published Reports
Enabling SSO When Power BI Service Connects Directly to Dremio Enterprise
These steps require that the report was published with Power BI Desktop November 2022 or later.
- Log into Power BI Service.
- Open the workspace to which you published the report.
- Find the report and click the three dots next to its name.
- Select Settings.
- If you see the warning "One or more cloud data sources for this dataset have been deleted.", follow these steps to make the warning disappear:
- Expand the Gateway connection section.
- Collapse the Gateway connection section.
- Expand the Data source credentials section and click Edit credentials.
- In the configure dialog, follow these steps:
- In the Authentication method field, ensure that OAuth2 is selected.
- In the Privacy level setting for this data source field, ensure that Private is selected.
- Select the check box Report viewers can only access this data source with their own Power BI identities using DirectQuery.
- Click Sign in.
Enabling SSO When Power BI Service Connects to Dremio Enterprise Through Power BI Gateway
- Log into Power BI Service.
- Select Workspaces > Name of workspace.
- In the list, find your dataset for your report in the list, click the ellipsis button, and select Settings.
- In the settings for the dataset, expand Gateway connection.
- Recreate your data source by following these steps:
- Select the Maps to field.
- Select Manually add to gateway.
- In the New data source dialog, create a data source that matches the one that you previously used for your dataset. However, give the new data source a different name.
- In the Authentication method field, select OAuth2. Then, follow these steps:
- Click Edit credentials.
- Keep the authentication method OAuth2 selected.
- If you want to enable single sign-on (SSO) for viewers of your report, and you created the report by using a Dremio Cloud connection type in Power BI Desktop November 2022 or later: Select the option Use SSO via Azure AD for DirectQuery queries.
- Click Sign In. Follow the sign-in process until you return to this location.
- Click Create.
- Return to the settings for your dataset.
- Under Gateway connection, verify that the new data source is selected in the Maps to field.
Result
Your reported is published and ready for other Power BI users to view it.