Creating Reports by Connecting to Dremio through .pbids Files
You can quickly create a connection to a single dataset by downloading a Microsoft Power BI Data Source (.pbids) file from Dremio and opening it in Power BI Desktop. You can then create and publish a report that is based on that dataset.
Prerequisite
Ensure that the Microsoft Power BI Desktop option is enabled on the BI Applications page. To enable this option, ask a Dremio administrator to follow these steps:
- Click
 in the left sidebar.
 - Select BI Applications in the sidebar.
- Toggle the switch next to Enable Microsoft Power BI Desktop launch button.
After the organization administrator completes these steps, refresh your browser window if you are viewing the SQL Runner.
1. Downloading and Opening .pbids Files
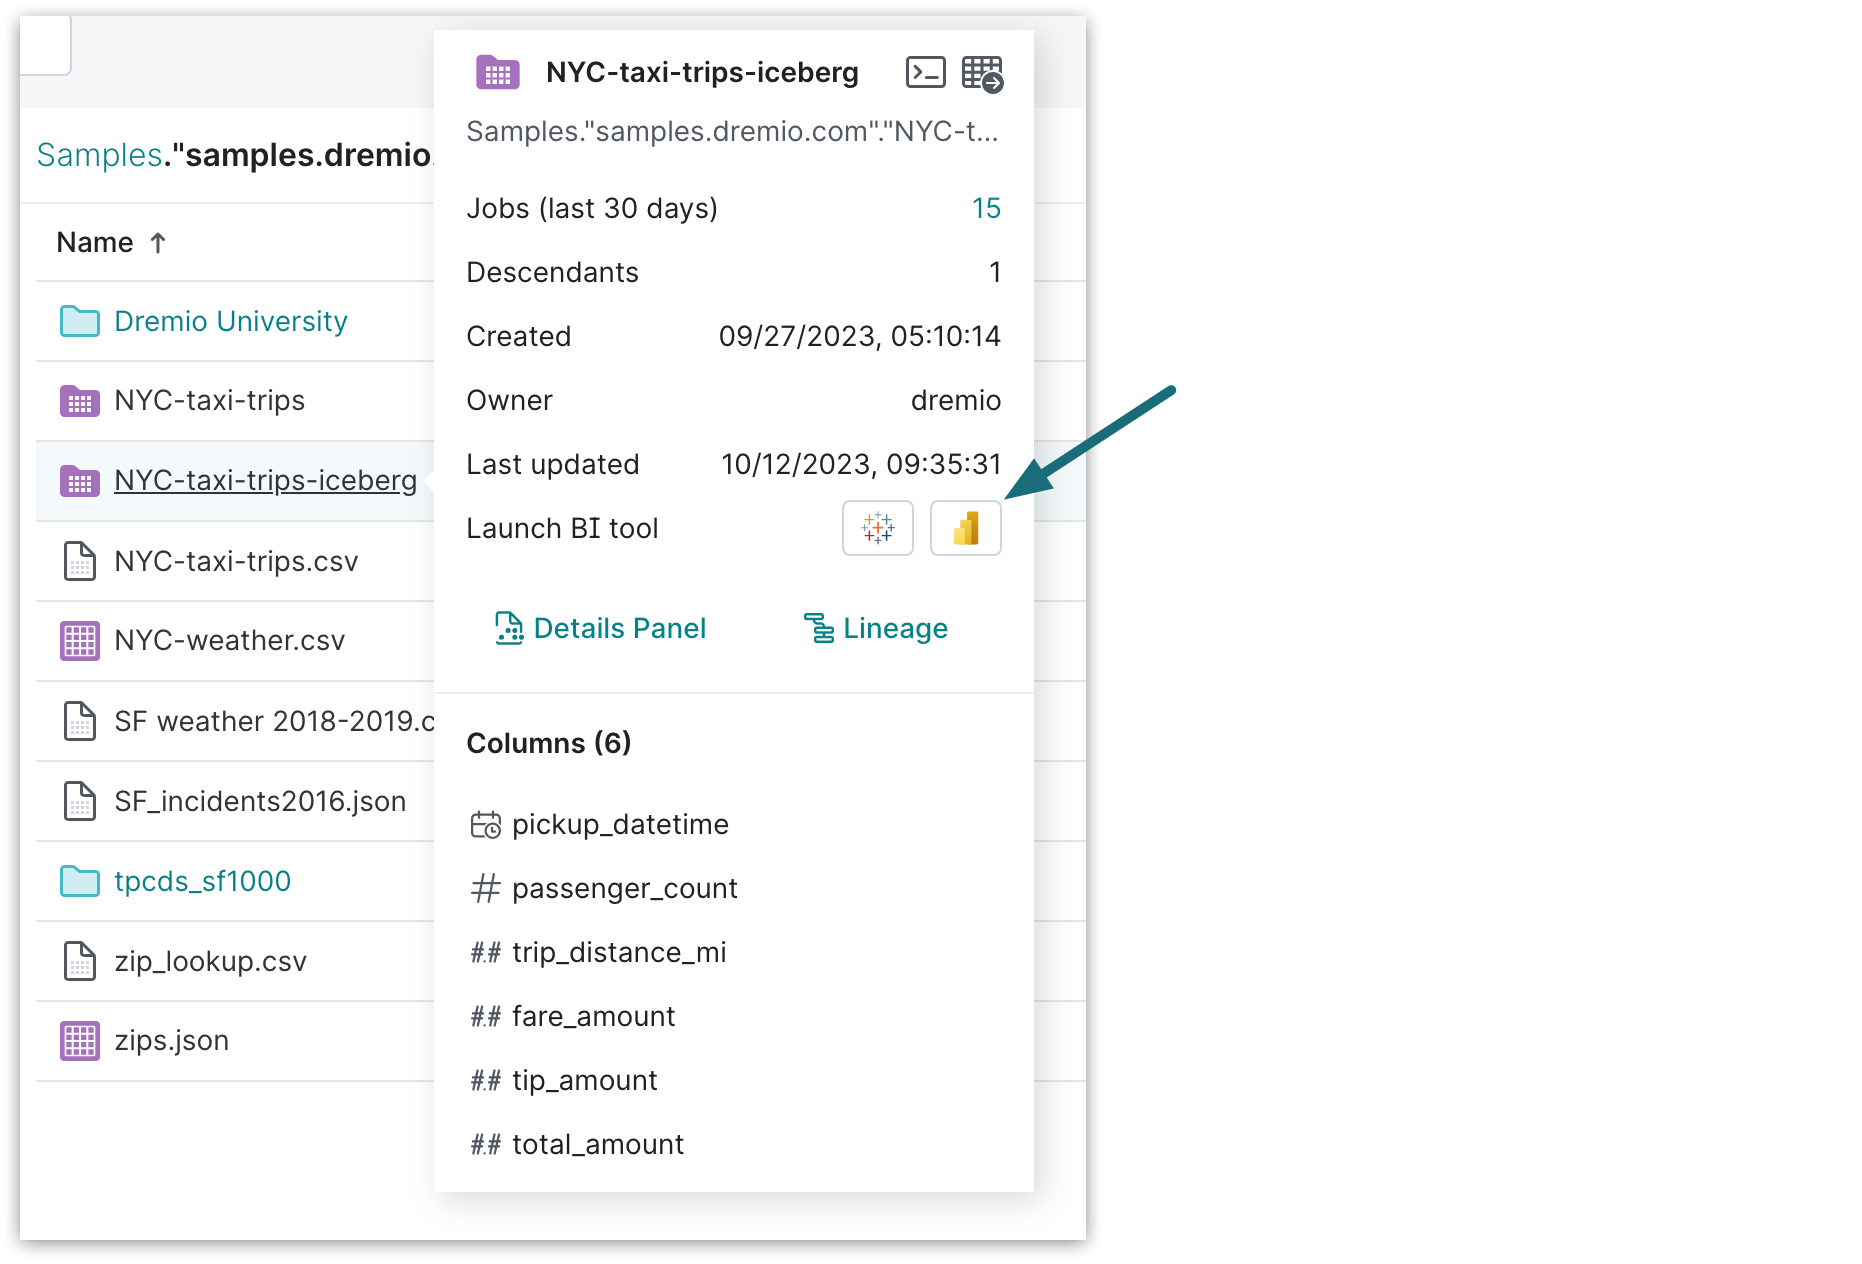
To open a dataset in Power BI from within Dremio, you can use the PowerBI button in the top right-hand corner of a dataset view. Perform the following steps:
- On the Datasets page, hover the cursor over the name of the dataset.
- Click
 in the dataset metadata card that appears.

A sample file with the complete dataset location in its filename and Microsoft Power BI Desktop Data Source as the file type, is downloaded. For example, Samples.samples.dremio.com.NYC-taxi-trips-iceberg.pbids.
- Click the file to open it in Power BI Desktop.
- Click Load.
- Save the file.
You can now browse and analyze the data in the dataset.
2. Publishing Reports
After you create a report that uses data in Dremio, you can publish the report to Power BI Service.
- Launch Power BI Desktop.
- Sign into Power BI Service, if you are not already signed in. To sign in, select File in the top-left corner of the screen and then select Sign in at the bottom-left corner of the menu that appears.
- Navigate to Files > Publish > Publish to Power BI.
- Select the destination. You may pick from a list of available workspaces to choose the desired one on which to publish. Select the workspace, and then click the Select button to publish.
If Power BI Service connects to Dremio through Power BI Gateway, follow these additional steps:
- Log into Power BI Service.
- Select Workspaces > Name of workspace.
- In the list, find your dataset for your report in the list, click the ellipsis button, and select Settings.
- In the settings for the dataset, expand Gateway connection.
- Recreate your data source by following these steps:
- Select the Maps to field.
- Select Manually add to gateway.
- In the New data source dialog, create a data source that matches the one that you previously used for your dataset. However, give the new data source a different name.
- In the Authentication method field, select OAuth2. Then, follow these steps:
- Click Edit credentials.
- Keep the authentication method OAuth2 selected.
- Keep the privacy level Private selected.
- Click Sign In. Follow the sign-in process until you return to this location.
- Click Create.
- Return to the settings for your dataset.
- Under Gateway connection, verify that the new data source is selected in the Maps to field.
Result
Your reported is published and ready for other Power BI users to view it.